Business workflow (trunk-based)
- Cloud Runners
- Self-Hosted Runners
1. In Azure Repo main branch create a YAML file named azdevops-ci.yml with the following content:
###################################################################################################
############################# ShamanOps pipeline | Azure DevOps ###################################
###################################################################################################
trigger:
- main
resources:
  repositories:
  - repository: automation
    type: github
    name: shamanops/resources
    endpoint: 'shamanops-automation'
    ref: main
stages:
  - template: azdevops/trunk/stable/base-pipeline.yaml@automation
pool:
  name: Azure pipelines
variables:
  - template: azdevops/trunk/stable/base-variables.yaml@automation
  # Environments:
  # full-with-drp (dev/stg/prod/drp) | full (dev/stg/prod) | mid (stg/prod) | minimal (prod)
  - name: environments
    value: 'full'
  # Project
  - name: projectName
    value: 'examples'
#-------------------------------------------------------------------------------------------------#
## Features  -------------------------------------------------------------------------------------#
  # Approvals
  - name: shamanopsBusinessApprovers
    value: 'business-user@customer.com'
  - name: shamanopsTechnicalApprovers
    value: 'technical-user@customer.com'
#-------------------------------------------------------------------------------------------------#
###################################################################################################
Remember to replace the approvers emails business-user@customer.com and technical-user@customer.com with own addresses.
This pipeline contains the minimum configuration to be used, to customize the pipeline please check the Customizations section.
2. Go to the shamanops project and grant the necessary permissions so it can use the 3 service connections you've created. (Find out how to do it here)
3. Create a pipeline and run it from the file created in step 1:
- Go to pipelines

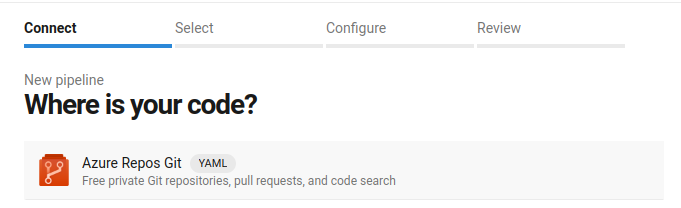
- New Pipeline

- From Azure Repos
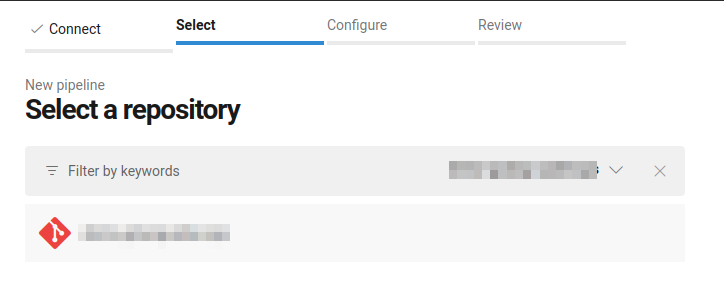
- Select Repository
- Existing Azure Pipelines YAML file
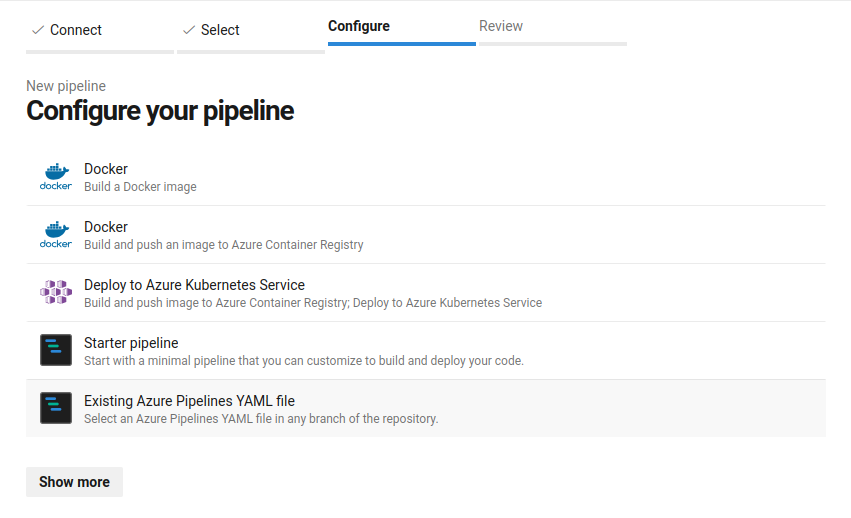
- Select file: azdevops-ci.yaml in main branch
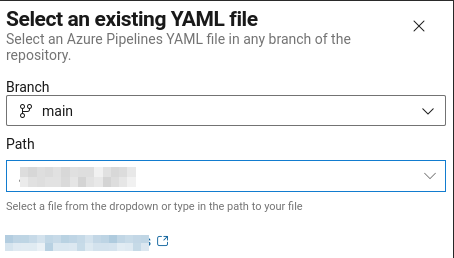
- RUN pipeline!

1. In Azure Repo main branch create a YAML file named azdevops-ci.yml with the following content:
###################################################################################################
############################# ShamanOps pipeline | Azure DevOps ###################################
###################################################################################################
trigger:
- main
resources:
  repositories:
  - repository: automation
    type: github
    name: shamanops/resources
    endpoint: 'shamanops-automation'
    ref: main
stages:
  - template: azdevops/trunk/stable/base-pipeline.yaml@automation
pool:
  name: onpremise
variables:
  - template: azdevops/trunk/stable/base-variables.yaml@automation
  # Environments:
  # full-with-drp (dev/stg/prod/drp) | full (dev/stg/prod) | mid (stg/prod) | minimal (prod)
  - name: environments
    value: 'full'
  # Project
  - name: projectName
    value: 'examples'
#-------------------------------------------------------------------------------------------------#
## Features  -------------------------------------------------------------------------------------#
  # Approvals
  - name: shamanopsBusinessApprovers
    value: 'business-user@customer.com'
  - name: shamanopsTechnicalApprovers
    value: 'technical-user@customer.com'
#-------------------------------------------------------------------------------------------------#
###################################################################################################
Remember to replace the approvers emails business-user@customer.com and technical-user@customer.com with own addresses.
This pipeline contains the minimum configuration to be used, to customize the pipeline please check the Customizations section.
2. Go to the shamanops project and grant the necessary permissions so it can use the 3 service connections you've created. (Find out how to do it here)
3. Create a pipeline and run it from the file created in step 1:
- Go to pipelines
- New Pipeline
- From Azure Repos
- Select Repository
- Existing Azure Pipelines YAML file
- Select file: azdevops-ci.yaml in main branch
- RUN pipeline!